Showing posts with label modern. Show all posts

Sunday, 5 February 2023

Williamsburg Bugs (Curious?)

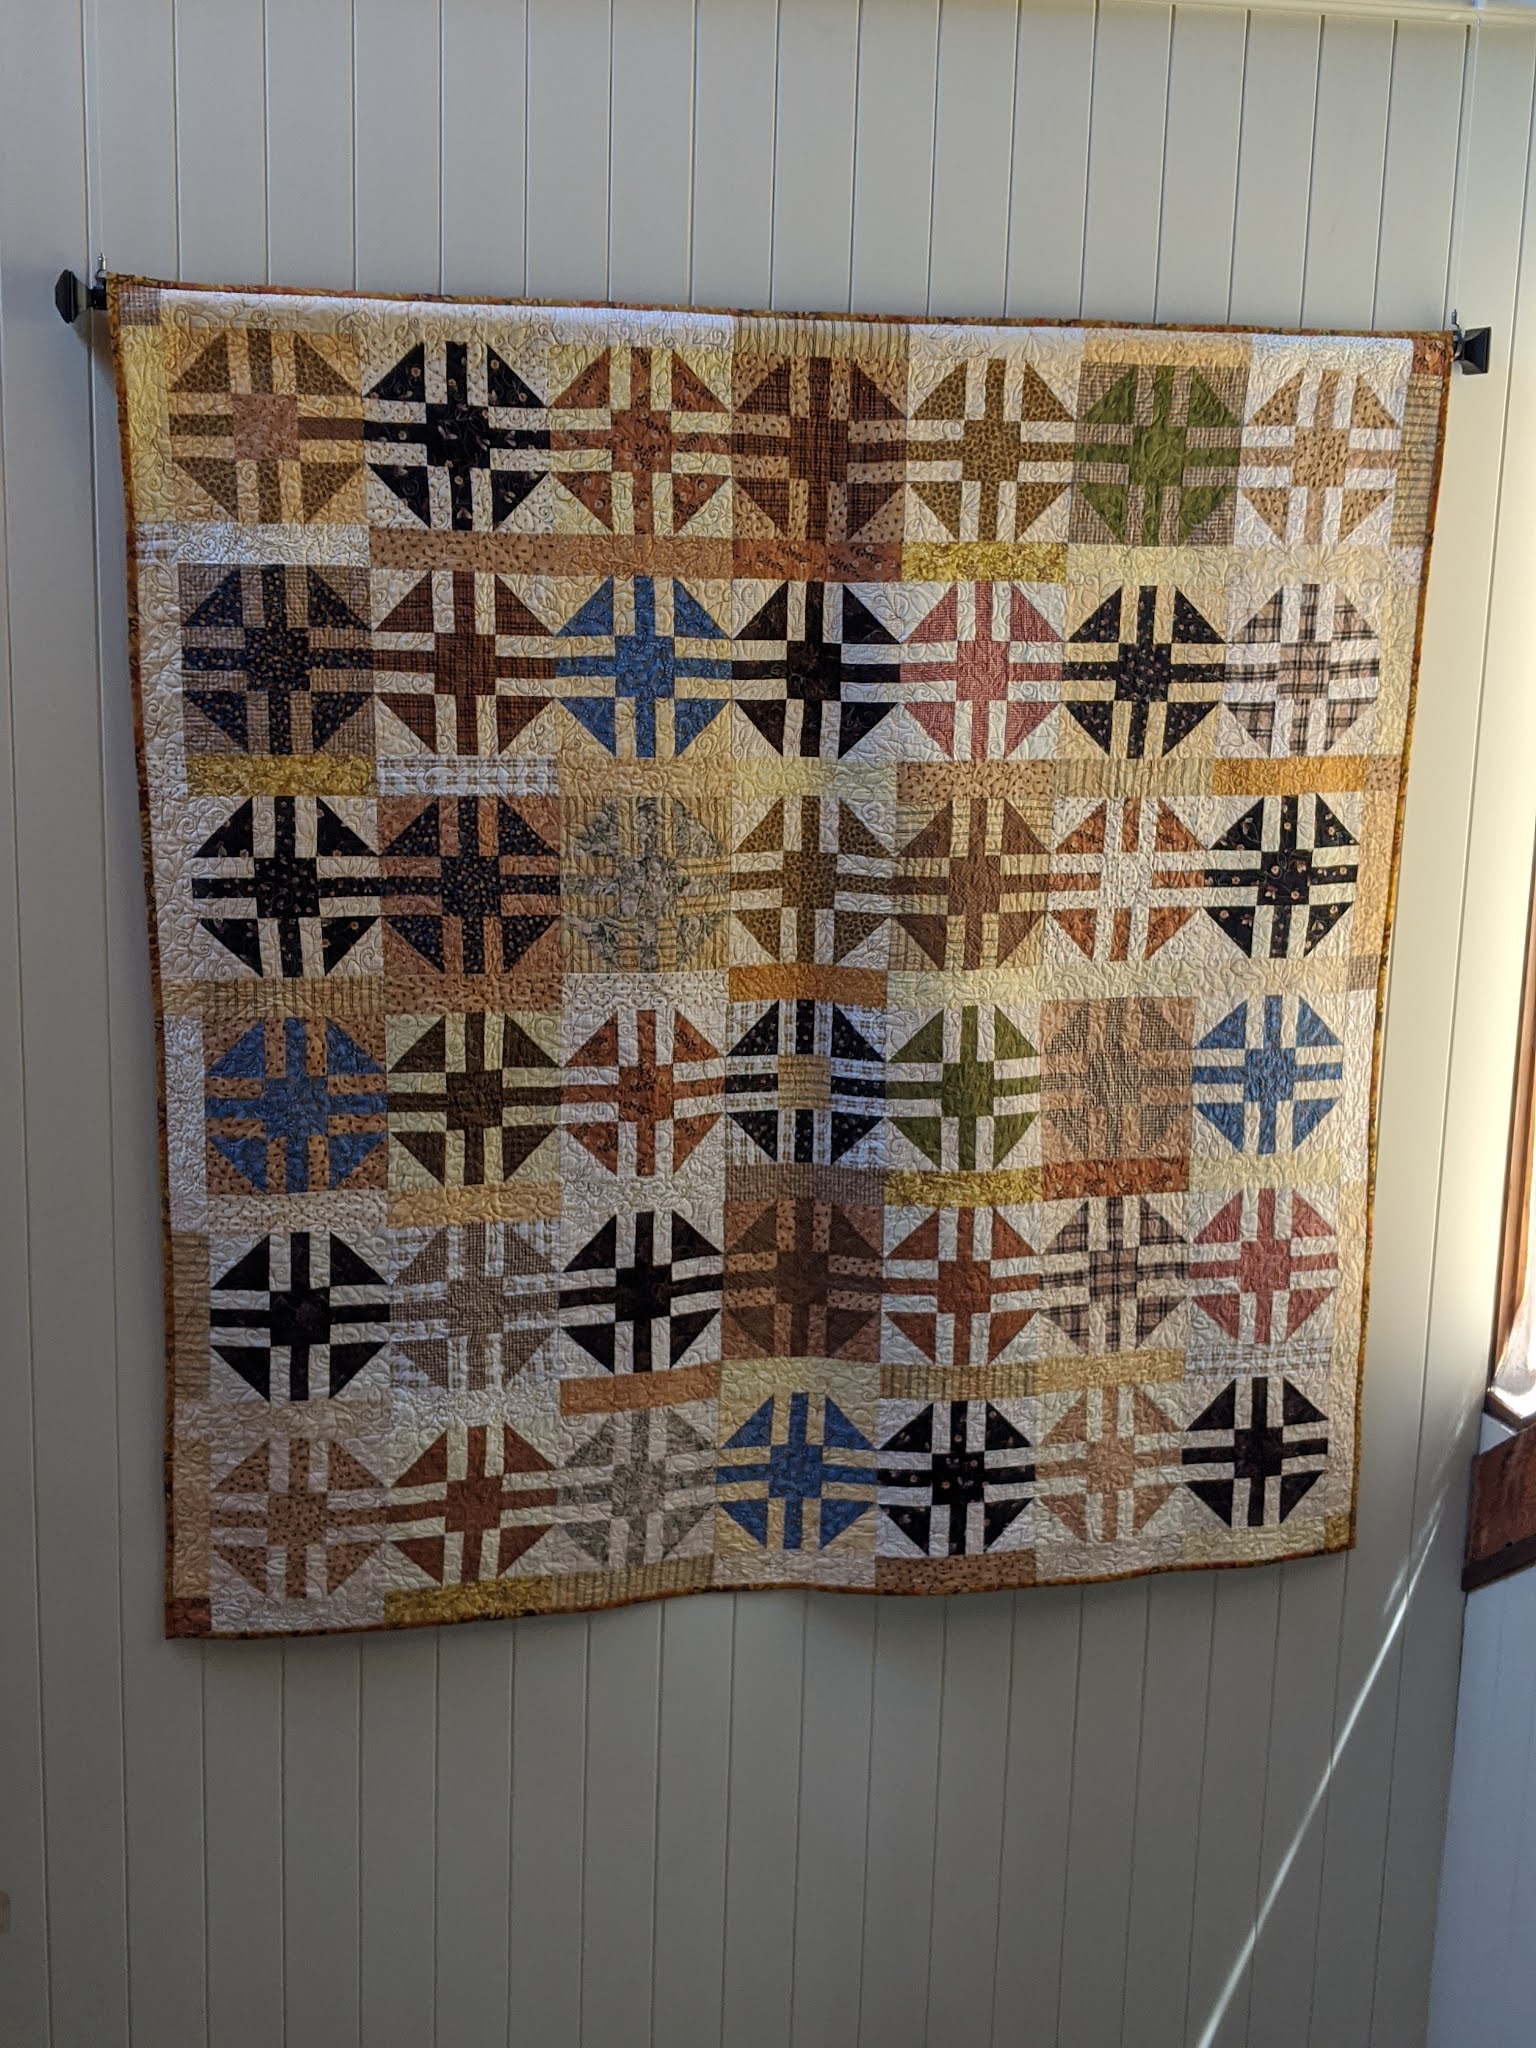
 Waltzing in Spring: 2022  (Started: 2021)

The Curio Collection designed by Betsy Olmsted was another super bargain I purchased at the Abby Aldrich Rockefeller Folk Art Museum Gift shop (Williamsburg, Virginia) in 2019.  So good in fact, I toyed with the idea of getting a second bundle.  Now that I’ve finished this quilt, I’m rather glad I didn’t.

This collection is so distinctive and I am so used to “scrapping from my stash”, that it took me ages & ages to decide on a pattern.  My challenge to myself was to work with only the collection fat quarters and not to add any “blendables” from my stash.  I also didn’t want to cut the pieces too small and ruin all those gloriously bright bugs and butterflies.  Once I found the Fat Quarter Fancy design by Caroline, SewCanShe, in Tula Pink’s wild fabrics, I knew this block, in version II, would work for me.  True to form, it sewed up easily and fairly quickly.  I even managed to make up some smaller squares from the left-over triangles – more fodder for the downsized but still dreaded scrap box! 

Waltzing in Spring out on show at last
But good old Bertie Bernina played up and refused to cooperate, so construction took a little longer than I planned.  Of course, we were still in Covid lockdown during this time too and the repair centre was well outside my LGA.  Such a dance; such a performance!  Dame Nellie Melba could not have done better.

Finally, all blocks were completed.  Not without having to add a few extra fabrics to make up the necessary block numbers, but I think they blend in well with the original collection.  I then spent some time arranging these blocks and finally settled on rows in colour order rather than random placement.  The colours are quite strong and range from blacks to bright colours, so rows seemed the best way to contain all that colour contrast and energy.  The backing was also an interesting decision to make and I finally settled on a bottlebrush design (bright red flowers on a black ground) by Jocelyn Proust then partnered this with a black and white modern print. (Photo when it comes off the wall!).  I quilted this one with a medium stipple in variegated thread.  I rather like the way it reflects the watery theme of so many of the fabrics.  Looking at this quilt seemed to me to be looking into tidal pools, the way we did when we were kids, looking for shells and other exciting bits of sea-life or flotsam. Above the pools, butterflies and dragonflies dance to their own music.  (Check out Heather's amazing collection of rather attractive bugs on Pinterest!)


A few close-up shots
The finished quilt is one that you might either love, or not!  It is quite modern in design, very bold and holds the strength of the fabric design and distinctive colours very well.  I loved the challenges of making this quilt and the opportunity to experiment and grow my own design and quilting skills.  Limiting myself to work with a single collection was a very useful learning experience.  Yes, it was a certainly a moment, and one that I will say I’m glad I had, but doubt I would repeat.

As an afterthought, I’ve finally realised what was bugging me (ha ha!) about the quilt.  It’s modern, fresh and appealing but it really is ALL about the fabric, which is highlighted further by a pattern that features large pieces.  It's not about me, and perhaps not in my style - only time will tell.  It also highlights one of the problems for quiltmakers.  Each quilt takes a great deal of time and effort - from planning to construction.  It’s hard to get to the end and find you are not quite so happy with the result.  Still, it wouldn’t be the first time I’ve unpicked a top to “re-imagine” it!  So, in all an interesting learning experiment and one that took me on a journey outside of my colour-mixing, pattern selecting comfort zone.

Just for the Record:

Quilt Finished Size: 153 x 191cm
Block Sizes: 20cm (8 inch); 7.5” finished
Cut in: 6 September 2021
Pieced: 24 October 2021
Basted: 1 November 2021
Quilted: Machine 27-29 Nov 2022 over 3 full days; 2 reels Gutermann Sulky 30wt 4023 (Natural Taupe) using 12 bobbins (Gutermann 50wt 618).
Quilt Type: Modern
Quilt Finished: 9 December 2022
Exhibited:
Collection: Home #129-2021
Pattern Name: Fat Quarter Fancy II, Free Pattern
Pattern Source: SewCanShe.com**
Fabrics Purchased: From the Abby Aldrich Rockefeller Folk Art Museum in 2019.
Fabric Design: Curio Collection by Betsy Olmsted (See Link above to her Collection)
Fabric Style: Brights; Bugs, Butterflies, Eggs & Corals
Materials Type: Printed Cottons
Wadding Type: Cotton (Warm & White, needled cotton)
Backing: Pieced; 2 fabrics

**SewCanShe by Caroline is a fantastic resource & one that I hope will, over time, help tame that overwhelming stash of mine.  (We can all live in hope!!)

Finding something to bind this quilt was a challenge too!
I ended up with a slate blue Bali Batik that seemed to suit.

Saturday, 11 June 2022

TideMark

Tidemark: 2021  (Started:2019)

I just love scrap quilts and after a rather too-long hiatus and an overflowing scrap bin, I felt the urge to search the net for inspiration.  Thanks to viewing an “extreme” (well, for me) quilt collection makeover by Pat Sloan, dying of envy for Jeni Baker's (In Colour Order) organised stash and suggestions by my friendly quilting buddies to check out Bonnie Hunter for her scrappy quilts, I present to you my take on Bonnie Hunter’s 2014 leader & ender challenge quilt.

Bonnie’s original design inspiration came from an old quilt named “Stained Glass”. It was made in 1890 by Frances Clarke Westergren of Boston and can be found in the book “Massachusetts Quilts, Our Common Wealth”.  It looks just fabulous as it is but also serves as great design to mess about with and to add your own personal touches. 

My scraps were not so much scraps but fabrics from a Moda Metro Mixologie Layer Cake pack lying dormant in my “Collections” box just waiting for the right moment to present itself.  I wanted a modern look, and if anything, thought using this selection of fabrics might lead to the quilt looking a bit too samey-samey (bland!).  Perhaps to rescue it, I decided on a black and whites for the corner blocks.  Not wanting to waste any of my Layer Cake pieces, I modified Bonnie’s block to suit, i.e. larger pieces.  Now that took some math effort! 


I’m normally fairly lazy when it comes to cutting – lulled by the ever-accurate rotary cutting instructions in Judy Martin’s books, so this came as quite a shock for the old grey matter.  Never-the-less it worked out and my math held up, until after a loooong break in proceedings, I inadvertently cut my remaining corner squares the wrong size.  Back to the drawing board, hi ho!  I now cut shapes then store them in sandwich bags; all clearly labelled with sizes.  

I’d planned to make this for a friend’s 60th (it did take a wee bit longer though) as the colours seemed to suit those chosen for her house renovation.  And the modern design, highlighted by the black & white corner blocks, looked great.  To me, it was very much in keeping with her outlook on life.  She loves the water, and as the quilt looked rather like tiles in an exotic swimming pool, I chose to finish it off with a medium stipple (or meander) pattern.  

For those interested in Pat Sloan’s stash management process, here is a link to her blog post.  Pat offers a quick and easy approach to sorting out the bags, boxes and suitcases full of scraps into functional scrap sizes. Now all I need is the time to be so organised - ha ha!   

The garden is a bit too shady to show the quilt colours at their best


Just for the Record:
Quilt Finished Size: 159 x 190cm
Block Sizes: 4.5 x 8.5” rectangles; 2 ¾” squares (incl s.a.)
Cut in: 17 Jan 2019 (started working out pattern size)
Pieced Started: 21 Mar 2020; Finished: 28 Dec 2020
Basted: 2 Jan 2021
Quilted: Machine: 15 Mar 2021
Quilt Type: Modern
Quilt Finished: 24 Mar 2021
Exhibited:
Collection: Home #071
Pattern Name: Lozenges
Pattern Source: Bonnie Hunter 2014 (PDF pattern here)
Fabrics Purchased: Moda Metro Mixologie layer cake…
Fabric Design: Prints, Stripes & Dots
Fabric Style: Brights
Materials Type: Printed Cottons
Wadding Type: Cotton
Backing: Pieced using left-over remnants
 
Progress underway in 2020

Saturday, 18 December 2021

A Sunshiny Day

 Summertime: 2020  (Started: 2016)

This quilt was something of a mis-adventure.  I just loved being able to paper-piece these wonderful Sue Ross circles and so, for quilt #3 in this design, decided on using a selection of blacks and whites I had acquired over the years.  Yes, including a stash of FQ’s purchased from Keepsake Quilting in 1999.  So, in early 2016, I began piecing up my B&W Circles of Fun.

I kept at it for a while but something was just not working and so it was stuffed, forthwith into the UFO Box.  Fun it was not.  March 2019 must have been a watershed moment because I don’t often unpick a quilt to basics.  But this one needed it. 

Thus, after lingering for another 12 months, it assumed priority as a project to complete during my “early pandemic” therapy.  I really just wanted this B & W monstrosity finished and off the books.  So as to speak!  Its rebirth took most of 2020; I trimmed down the size, removed those hideous pink circles, and turned the border into the backing.  And voilĂ , all ready for quilting.  By 25th December 2020, I had another long-term UFO finished.  I added a final touch of bling with some of my grandmother's black buttons to tone down the little yellow centre circle. In honour of it's December finish and bright vibe, it was named “Summertime”. 

A holding photo until I can get a better shot - I'm learning lots about photographing quilts too!
And now that I look at it, I think that centre yellow circle may have to go too...
View the top pre-makeover.  All I can say is, that at the time, it was getting there.  Where-ever "there" is.  Now, I know for sure it’s not the best thing I’ve ever done, but at least its finished and was fun to make.  A foray, if you will, into the world of modern quilting that de-railed a bit but as it’s often said, “the next quilt is your best one”.  That’s rather like “free beer tomorrow” offered at your local.  We’ll see.  

And if you want to share some sunshiny too, here's Jimmy Cliff.

Just for the Record:
Quilt Finished Size: 131 x 131cm
Block Sizes: 21”
Cut in: 13 Feb 2016 (started)
Pieced (1st try): 8 Apr 2016
Still in Work Box: 24 Jan 2017 (not loving it)
Reconstruction: 26 Mar 2019
Top Pieced: 20 Feb 2020
Basted: 25 Feb 2020
Quilted: Machine: 20 & 22 Dec 2020
Quilt Type: Mostly Modern
Quilt Finished: 25 Dec 2020
Exhibited:
Collection: Gifted 3 Oct 2023
Pattern Name: Circles of Fun
Pattern Source: Sue Ross
Fabrics Purchased: The Stash & B&W Medley purchased in 1999…
Fabric Design: Prints, Stripes & Ethnic prints
Fabric Style: High Contrast B & W with a dash of yellow
Materials Type: Printed Cottons
Wadding Type: Cotton
Backing:
Pieced using left-over remnants of original borders

Thursday, 11 July 2019

Intermission

I’ve been doing a lot of wishing lately.  You all know what I mean; indecision that comes from wanting to do something.  Perhaps it’s something new or maybe just a project lurking in the box of the “great unfinished”.  But you’re waiting, waiting for lightning to strike.  And the resulting idea - you know it has to be really good!

So, rather than fret, I’ve been lurking on the net instead of petting my stash, and like Brenna Riley Gates (The Quilting Company) trying to decide what to do and where to go.  I’m currently on a mission to find quilts that make my heart stop a beat, that inspire me or are just crying out to be made.  I’m looking for the commonalities so I guess I’m looking for me.  I’m in the process of assembling a “little” collection of these images to make into a screen saver or similar – an easy-access on-line personal inspiration board.  I can hear you all shout “Pinterest” or “Instagram” but really, I’m not sure at the moment I want another reason to sit longer at my computer.  I’m really, really trying to find more time for sewing…


So indeed, WHY am I blogging?  Well, in my search for interesting Nancy Cabot blocks after my last quilt, I revisited an inspiring modern scrap block in a Flickr group (link here) called X & + (or X Plus or Criss-Cross).  It seems Nancy Cabot originally called it Spool Block.  My need for a pattern (with the math done to confirm my own guesstimations) led me to Elizabeth Eastmond’s blog with said pattern nicely done along with some wonderful wisdom that’s well worth repeating.

  
I hate every project three months in.  I’m exhausted.  I’m questioning whether it’s any good.  I’m unhappy.  [But] that’s just the process.  You have to get through that.  You have to commit. . . there’s no pulling out–it has to work.  And then it works out, because of the commitment.  There’s always failure when you don’t see it through fully.” Andrew Zuckerman, photographer, film director & author (Interview link).  Isn’t it true that sometimes you just need to sit and listen to understand where you have come from and going to…

This same block (free download) also led me to Scissortails who indeed is asking questions and looking forwards (link here) in an admirably organised way – it’s all worth pondering and getting a little personal sometimes!  I’m wondering, given the connection seems to be either Nancy Cabot or her Spool Block, if this is what has lead us to this point of personal contemplation (just plain navel-gazing really) but it’s just so useful/therapeutic/Zen.  So, maybe it is back to the great unfinished, to accept the challenges and work with them – maybe just thinking outside the box or in a different light might just resolve those Gordian Knots.
  Or just start a new one! 


Monday, 17 June 2019

Zesty Lemons and Zippy Bees

The Queen's Honey Bees, Osborne House:  2019  (Started: 2019)
Well, I’m still on a mission to use up my existing stash and after a somewhat unsuccessful bash at “re-creating” my black & white version of Circles of Fun, I decided to check out the yellow box.  In my other “collection” box I found some small pieces called Crow Hill Apiary Garden that held promise of making the yellows interesting.  Now for a pattern…
Initially, I had thought of a quick & easy snowball Ă  la Kaffe Fassett.  It just seemed too simple.  After all, Kaffe’s quilts sing because he uses his strong and colourful fabrics.  I wanted a bit of design complexity (without all the hard work) that would give my yellows a more modern touch.  After all, some of these fabrics have been sitting in that box for nearly 30 years! 
So, it was with some relief that I happened upon an interesting old quilt in my favourite Nancy J Martin book.  It's a design called Paths & Stiles and was a pattern made famous by Nancy Cabot.  Martin’s instructions are always so reliable, so I happily cut away, making a few changes here and there, then assembled enough blocks to make a decent sized queen bed topper.  It wasn’t until I had stitched up the top that I realised I was sewing another version of Monkey Wrench (or Churn Dash).  This was the pattern of choice for my blue box project from last year, and a single, lonely quilt made in 2018.  Oh dear!  Twilight Zone music plays…
With the Cap’n away, I managed to find time to baste and machine quilt, quick smart.  I cannot tell you the sense of achievement I felt when it was all done.  I’d even noted in my diary “finished top! – happy, buzzy lemons.” At least one quilt finished for 2019 and a very happy, and thoroughly re-inspired stitcher. 
Of course, I didn’t manage to get a photo before I leapt on the plane for warmer weather, so that’s a chore to follow…eventually
If you want to find more Nancy Cabot patterns, then here’s a few inspiring sites to spend time browsing:
  • A Flicker Group organised by “Fresh Lemons” with a thoroughly Modern twist on Nancy Cabot designs…just stunning!  I hope the group is still going since Flicker’s new (& fee demanding) ownership.  Let’s see.
  • A Nancy Cabot Sew Along Group
  • Illinois Quilt History – Nancy Cabot
  • And to finish, one of many Pinterest sites with Nancy Cabot (Chicago Tribune) patterns
Now for the Apologies:  I know I measured this quilt before I took flight, but that sticky note is lurking somewhere, with the details of its name, hiding who-knows-where.  All this, including a photograph session, and a name, will be rectified once I hit Aussie turf again, soon, maybe…
Just for the Record:
Quilt Finished Size: 170 x 170.5cm
Block Sizes: 9in
Cut in: 14 Jan 2019
Pieced: 30 Mar 2019
Basted: 5 Apr 2019
Quilted: Machine 17 May 2019
Quilt Type: Modern-ish
Quilt Finished: 24 May 2019
Exhibited: No
Collection: Home #057
Pattern Name: Nancy Cabot's Paths & Stiles
Pattern Source: Nancy J Martin's 101 Fabulous Rotary Cut Quilts p.159
Fabrics Purchased: From the Stash…with maybe just one or two newbies
Fabric Design: Various
Fabric Style: Fresh Yellows & Crow Hill Apiary Garden pieces
Materials Type: Printed Cottons
Wadding Type: Warm & Natural Cotton
Backing: Pieced using left-over remnants
Thread Use Machining: 1 reel
Thread Use Quilting: 24 Bernina bobbins (1 reel) and another 1 reel
Thread Type: Gutermann natural cotton

Sunday, 31 March 2019

Getting Cross

Black & White Circles: 2016    A Progress Report

Inspired to actually do some sewing, I hit the box of the Great Unfinished and dragged out my black and white circles.  Again.  It's always lacked a little something and nothing I do to improve it seems to fit.  My last effort was to sew some bright pink centres to give it a bit of a lift.  Then I decided that an applique of some large-ish pineapples would make a difference.  Nope!  That grand idea didn't even get past the pinning stage.

So I finally decided to hang it up and take a photo - a chance to get a bit further away from it and spend time in contemplation and study.  
I've decided that there's just too much "white" space in that middle border between the circles and the outer wavy border. The thin yellow border is not enough - it only looks lost and lonely. 

You can understand my dilemma?
The outcome has been pinks removed, pineapples binned and the centre section of the quilt unpicked and in pieces again.   Just sometimes, don't you have to go backwards to go forwards?

Monday, 19 November 2018

Butterflies & Birds

Butterfly Garden: 2018  (Started: 2016)
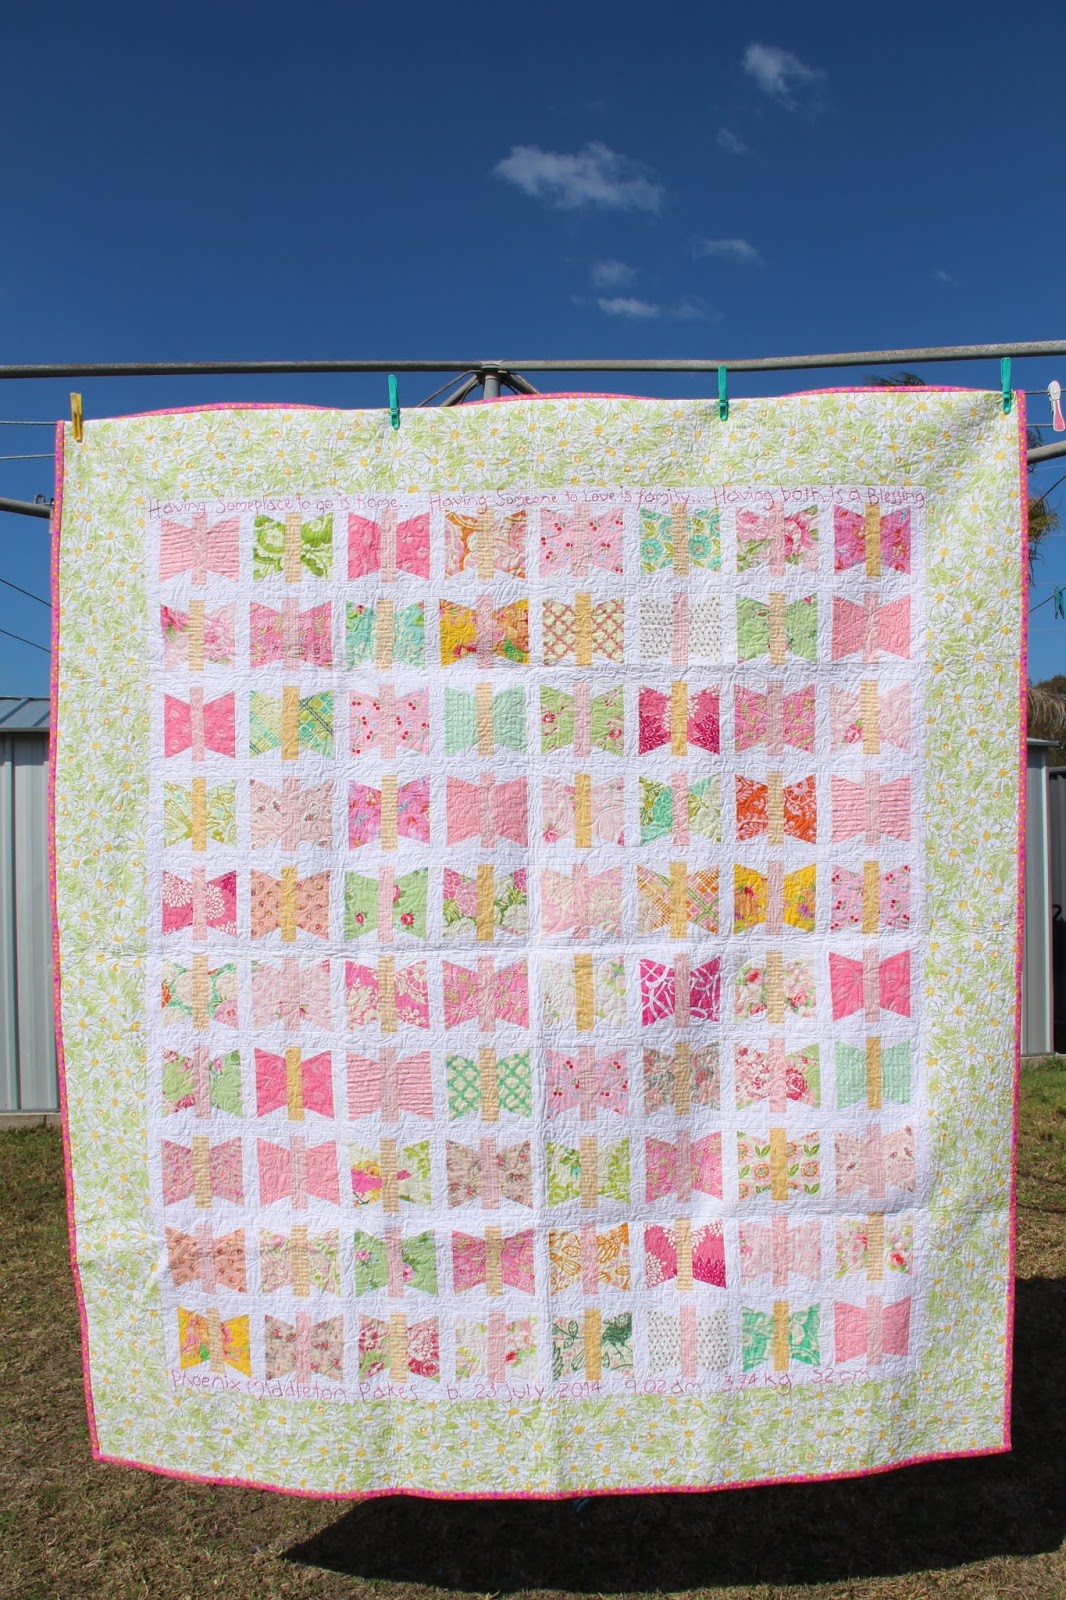
A certain amount of dithering went on with this quilt.  Firstly, what to do for a first grand-daughter?  Then finding myself selecting a heap of charm squares in “just the right pinks” and finally, wavering between, not one, but three patterns.  Well, I was struck by the ever-so-cute quilt in Quiltmania (see info below) but found a fantastic tutorial by the ever-so-productive and ever-so-scrappy red pepper quilts.  From this RPQ tute, I was directed to Mrs Schmenkman Quilts and proceeded to cut merrily from all three directions.  This explains why some of the blocks are a little off.  Not to worry, it all went well once I had my nose firmly planted on the grindstone.  As one must when a 4th birthday is close at hand…
Proof of a Start - taken 17 Mar 2016
2016 turned out to be not such a happy year for us as a family, so it wasn’t until the end (September) of 2017 that I finally pieced up all the blocks and added a border.  Once again, I just took sooo long to decide on a suitable border arrangement; finally settling on setting the blocks on simple white sashing to make the butterflies dance and a light green and yellow floral border - so fresh and citrusy.  At this same time, I also resolved to add something meaningful on the quilt and found the perfect solution in another Quiltmania Issue (details below).  Even if it meant more embroidery!
(Photos to follow when I find them - having cleaned up, they're momentarily "lost")
Found my photos at last however they are sadly in need of editing as the
colours are washed out (in the strong sunshine) or too dark (in the shade).
Hmmm! Who said life wasn't meant to be easy.... but they'll do for now!
However, before embroidering anything, I needed to baste the quilt.  I initially chose a natural shade but very quickly unpicked all my work when the whites in the quilt took on a yellow cast.  Hmmm!  Not clever.  My one day job turned into two and I re-basted on a white cotton batting.  Much better. 
Machine quilting also seemed to take forever, as it does on a small domestic but finally it was ready for me to add birth sampler details and of course, that lovely sentiment from another Quiltmania project in Issue #100:  Having someplace to go is Home, Having someone to love is Family, Having Both is a Blessing”. 

Sadly, I seem to be in quilt limbo again.  Blame Spring and an urge to clean up that dreadful, disorganised mess my photographs have become over the years.  Weeks later and I’m only starting to surface from a bit of a high-tech (well, for me at least) frenzy.  So, everything’s nearly sorted.  And I'm hoping my photos of this quilt will appear soon.  To lift the spirits though, Mrs Maggie is warbling each morning, the Plovers are busy protecting chicks on the bowling green and all our Jacarandas are about to bloom into a perfect purple haze. 
Just for the Record:
Quilt Finished Size: 150 x 168cm
Block Sizes: TBC  (but using 5” charm squares for a set of wings)
Cut in: Feb/Mar 2016
Pieced & Basted: by Jun 2018
Quilted: Machine Jul 2018
Quilt Type: Fresh & Modern
Quilt Finished: 25th July 2018
Exhibited: No
Collection: Gifted #018
Pattern Name: Mimi’s Butterflies p53
Pattern Source: Quiltmania #52 2006
Fabrics Purchased: From the Stash and maybe a few little extras…
Fabric Design: Pinks and anything fresh
Fabric Style: Brights
Materials Type: Printed Cottons
Wadding Type: White Cotton
Backing: Pieced using left-over remnants
Embroidered Quotation: Quiltmania #100 2014 p54

Friday, 27 February 2015

Russian Red 2008

Getting All Antsy Pantsy*: UFO  (Started:2008)
Hard at Work at the NSW Embroiders Guild, Concord

It seems hard to imagine that I started my Explorer Series 7 years ago.  Where did that time go?  In 2008, I signed up for an Art Quilt class at the NSW Embroiders Guild with Carolyn Sullivan in the vain hope that working in this genre would better suit me.  I wanted to work smaller, more creatively and in series (in effect - smarter).  (Does that sound a familiar refrain?)  It was also a great opportunity to learn how to better organise a journal (or two).  The classes ran over 8 sessions starting in Feb, so it was a full year commitment.  I was very happy that some of my Randwick quilters signed up with me – we often met out of class to inspire each other and thus managed to finish many of our set projects. 

 
#1 The Research Station (33 x 33cm) 2008

#2. Coral Garden (32 x 38cm) 2008
Whilst my plan was grand indeed, I managed to miss a couple of sessions and so those pieces sit quietly in my UFO box waiting, waiting…  My journal though is quite a resource and if I live to 100, may get round to exploring some of the many ideas that came out of it.  It was a fun and thoughtful class, certainly guaranteed to shake out the cobwebs and lead you gently into the world of art.  Sometimes you just need that!

As I wanted to work in series, I set myself a theme of “exploring an exotic life”.  My inspiration was the life and work of a Russian Marine Scientist who lived and worked in Sydney (1878-1887).  Explorers, maps, travel, the ocean & its creatures and Russian red drove my design choices within our monthly sessions.

So began my Voyages of Discovery. My Explorer Series (Collection# 51) followed our monthly tasks:
  1. Built Environment - Windows (The Research Station)
  2. Natural Environment - Leaves (Coral Garden)
  3. Natural Environment – Networks (Voyages of Discovery)
  4. Women’s Work
  5. Simplify the View (Immersion - yet to be finished)
  6. Personal Icons & Symbolism
  7. Movement (Rock, Paper, Scissors)
  8. Just Script
#3. Voyages of Discovery (38 x 48cm) 2008

#7.  Rock, Paper, Scissors (46 x 47cm) 2008
*My family interpretation of this saying, antsy pantsy was "that you were getting a bit above yourself" or a little bit fancy.  Does that help?  No, probably not.....

And if you're wondering, the dragonfly is a symbol of regeneration & change.  I also added an inked stamp from a Chinese chop (seal or name stone) that I had made in Singapore.  The red threads were added for "luck & prosperity".  These "marks" were on all the pieces I made in this series.

#5.  Immersion (& a work in progress still!)

Wednesday, 24 April 2013

Changing the Rules

South Pacific Drums: 1997  (Started: 1996)
Colourful spools & a prairie points held down with buttons
(the garden is just the right setting?)
The RLI Quilters had scheduled workshops during their monthly meetings so I seemed to forever be finishing off projects, getting further and further behind.  Rather than attempt bed-size quilts, I began to think about working smaller to get more done – meaning FINISHED!  So, when we had this workshop with Dawn Perrin May/Jun 1996, I was well on my way with smaller (and fewer) quilts.  At this time I was not only working full time but studying at university too (forever the student…) so time and space management was rather important.  Even so, I managed to get a little quilting done on the side.

I planned to use fabrics that were “a little different” in this quilt rather than end up with yet another scrappy quilt of American florals.  I used up some of the boys old board short fabric and some cotton sarongs that I had purchased on a trip to Fiji (on a Pacific Island cruise – a necessary  & relaxing break), then chose a plain gakky green to define the quilt as it had a definite tropical feel to it.  On reflection, (and had they been available then) it would have been better to have used a motley fabric such as a Bali batik.  I added some beads & buttons to tie down the prairie point edging.  In the end, I thought the spools looked more like African drums and for some reason I always think of that children's poem about "the great grey, greasy Limpopo".
This was my first attempt to do an interesting backing too. By this stage I was buying Quilters Newsletter and they often had helpful articles on subjects like "backings" to help you mix things up a little. Anyway, I had fun making it; especially the big Hawaiian flowers and the batik pieces which helped define the theme.  We machine pieced this quilt, and I machine quilted the centre panel of spools, and then hand quilted a border after tying the prairie points down.

Just for the Record:
Quilt Finished Size: 121x 121cm
Block Size: 6”
Cut in: 1996
Pieced & Basted: Machine 1996
Quilted: Hand & Machine 1997
Quilt Type: Workshop
Quilt Finished: 1997
Exhibited: 
Collection: Home# 026
Pattern Name: Spools
Pattern Source: Dawn Perrin
Fabrics Purchased: Fiji (some)
Fabric Design: Eclectic Mix
Fabric Style: Cotton
Materials Type: Cotton
Wadding Type: Cotton Batt
Backing: Cotton


Lessons Learned:
I loved the quilting process –sewing, cutting, problem solving yet also providing me with a chance to be creative. Whilst I appreciated the improved range of opportunity offered by ever increasing popularity of this craft, I was also conscious of an overwhelming American influence in the marketplace.  Neither did I want to faithfully replicate someone else’s design – it was important to add my own stamp.  I’m not sure I was entirely successful in this case as the result grates on my nerves at times.  But it was indeed another step forward in the learning process.    

Saturday, 12 January 2013

Smitten by Amish Colours

Amish Houses: 2006  (Started: 1988)

I had been introduced to the exciting colours of Amish quilts and wanted to make something using these specific colour ways.  I chose a traditional schoolhouse block to make up.

Amish colours - well, sort of!
Gradually, I collected colours and purchased a pack from Keepsake Quilting; probably to supplement what I had already in my stash.  I think I started the house blocks as early as our Queenscliff days in 1988.  The blocks languished for many years as I wasn’t particularly inspired after I had made them up.  They just seemed a little pedestrian, even with their night & day theme, if you know what I mean.
Gray seems to help make colours pop
I finally came up with the additional star blocks after flicking through some old issues of Quilters Newsletter Magazine and began to work them up from some of my leftover plains.  I got to the basting stage in 2002 but it still looked dull….
Backing adds that final lift
Then, back in 2006, I found some vivid stars at Craft Depot in Pennant Hills and couldn't wait to get home to undo my basting.  This colourful backing added a bit of zing to my quilt and I started hand quilting the house blocks and stars. Then I machine quilted the border from the back using the stars as a guide, resulting in an interesting star shape on the borders.  Should have done this all over!!!  Always a lesson learned…  Still another UFO off the pile and finished at last!
Just for the Record:
Quilt Finished Size: 98.5 x 167.5cm
Block Size: 12”& 6”
Cut & Pieced in: Hand 1988
Basted: 2002
Quilted: Hand & Machine 2006
Quilt Type: Amish Influence
Quilt Finished: 2006
Exhibited: 
Collection: Gifted 3 Oct 2023
Pattern Name: Little School House
Pattern Source: Unknown
Fabrics Purchased: 1988
Fabric Design: Amish Plains
Fabric Style: Cotton
Materials Type: Cotton
Wadding Type: Thin Poly Batt
Backing: Cotton


Lessons Learned:
Another UFO that waited many years for inspiration to strike! Sometimes it’s quite a pleasure to re-visit UFO’s.  I keep them all in a separate box so that I can challenge myself to finish at least one a year.  
(Previously, I had a couple of boxes, so there is progress, albeit slow!!)

Thursday, 10 January 2013

Creative Tendencies

Creative Landscapes: UFO (now lost to the Bermuda Triangle of stitching) 

I signed up for a workshop on sewing creative curves by Marcy Paynter (10 Sep 1988) at Geelong Quilters Guild.  It was an interesting effort to make up our own landscape designs.  The design was sketched on card, cut into a jigsaw of shapes and then a variety of fabrics were paper pieced by machine stitching it (a close zigzag) all together.  The concept was good but I flagged when we started to use clear nylon thread to applique the pieces together.  Somehow, plastic thread did not align with my orthodox habits – cotton fabrics and cotton threads….

Needless to say, the piece still languishes in my garden shed waiting to be finished.

Just for the Record:
Quilt Finished Size: cm
Block Size:
Cut in: 1988
Pieced: Machine 1988
Quilted:
Quilt Type: Macy Paynter Workshop
Quilt Finished: Not Yet Finished
Exhibited: 
Collection: Home# 012
Pattern Name: English Paper Piecing
Pattern Source: Macy Paynter
Fabrics Purchased: 1986/87
Fabric Design: Plains & bold prints
Fabric Style: Mixed
Materials Type: Mixed
Wadding Type: Thin Poly Batt
Backing: Cotton

Lessons Learned:
Not my kind of thing.  Perhaps I wasn’t quite ready for this type of “creative” play with various textures and thicknesses of fabrics.  The final issue I had was using monofilament thread (clear nylon).  I can understand why of course, but just couldn’t take to it.  As a result, this piece languished in my UFO box until the final decision about what to do with it was made. Despite my feelings, I believe it was a worthy exercise.


Ed Note:  5 April 2015
Finally I've decided to consign this project to File 13....  It has taken some courage to come to this decision but really, there comes a time to just let go.  This was never a masterpiece in the making or even a personal favourite.  After giving two old projects a new lease on life recently, I made the decision that this little number was never going to improve no matter how much hard work went into it.  So rather than keep fretting, it was time to wave goodbye and take it off my stress-inducing UFO list.  Just so I'll remember it, I've taken a few photos, and I think you'll understand:
A gaudy mix of velvets, cotton, sateen and silk

Paper-pieced back view

This was the original drawing
  All gone, no regrets!